


")
")
")
")
")


Artwork created in 2000
There are many city pictures in Oyonale. Cities are a favourite subject of mine, so that the IRTC "City" topic was somehow perfect.Too perfect actually, because it came at a time when I was of tired of making urban pictures. I didn't want to make another "something strange happens here" picture, or model another building. I wanted fresh ideas that would involve the use of new techniques.
However, after having tried with limited success a couple of purely "fantastic" ideas, it became obvious that the only good subject would be a real city, possibly one city that would need no introduction, no explanation, the very symbol of city life, well, the old Big Apple itself, New York City. There were many advantages to this choice. First, I had recent memories of the place. Second, there was an abundance of reference material, including many personal photos. Choosing a real city also meant that I had to do it as real as possible, and photorealism is something I had avoided to do until now in 3D.
Of course, even with the city as the main attraction, the image still lacked concept. The Megapov documentation provided the solution: because meshes can be copied (almost) endlessly, they?re good candidates for motion blur. So here it was: the picture would be about New York (actually a fantasy twin), and it would involve a motion-blurred character. Since motion blur is primarily a photographic effect, it was another excuse to make the picture highly realistic. The character could be a ghost from the past : a human being, like a XIXe century lady, or even an animal. I briefly ran experiments with a deer, but I decided that I had made enough of "animals in the city" pictures. The character also could be a simple, hurried passer-by. In fact, I'm still not sure of what the blurred character really is.
Using a personal photo of Time Square as a basis, I did a first test image. The motion blur worked quite well, but the surroundings were terrible. In fact the original photo wasn?t artistic at all : it was precise but bland. So I went back to my collection of photos and books, looking for inspiration. Finding the right one took a couple of days. It was a photo of a NY avenue under the rain. It was quite blurred and imprecise (the whole bottom of the picture showed a dark compact mass of people with no visible ground) but it was telling me something important: there?s no need to actually model rain to obtain a rainy effect, at least in a still image. With the right colours and lighting, a proper fog and a good amount of blurring would do the trick. So I would use the image as a guide for the colour and shadow balancing. With the general atmosphere secured by the photographic reference, I would have more freedom to work on the picture?s many other elements.
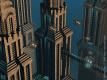
The first task was to create the general atmosphere, because it would tie the whole image together. One potential problem was that the image would be too dark. In the reference photo, the buildings were rather low, and there was a large expanse of visible sky. But because of that, the image wasn?t very impressive. I wanted tall, dark buildings AND enough light in the scene. So I created my first test scene, that involved making randomly-sized dummy buildings, a first sidewalk texture and some fog. Below is one of these first trial pictures:
Click on the image for a larger version.
Well, there was still a long way to go, but these first images were fundamental in trying a good number of combinations of lights and colours, until I came upon something acceptable. In fact, the atmospheric tuning was permanent until the very last moments. Particularly, because I did most of the modeling on a portable with a passive matrix screen, the colours appeared all greenish when shown on a more reliable CRT. So, instead of wild-guessing the right colours, I sampled them directly from the reference photo, and later altered them to suit POV. In fact, the same colour is used throughout the picture for the fog, the skies and most of the lights, but with different intensities and patterns. Finally, the atmosphere was the result of the following:
I had a lot of reference images but the trouble was to find the right proportions since verisimilitude was the key. So, using more or less detailed pictures of NY citizens waiting for the "Walk" sign, I tried to estimate the relative heights and diameters of the various parts of the lamp post models, while keeping the models as parameterised as possible for poetic license. The head, trunk and foot of the post were modelled in sPatch and then exported to DXF to be converted to the regular mesh format.
Particularly difficult to model was the "Walk/Don't walk" box, whose precise geometry kept escaping me, in spite of numerous photos of the device. I wanted the thing to be as flexible as possible, so that I could create various "corner" lamp post with the same basic model. This proved to be very useful, and worth the sweating. The "don?t walk " image itself was first painted in Picture Publisher. The effect was good, but not that good. Then I found a real-life image of it, and the effect was immediate. Instead of a regular POV picture, I had something that looked real, for a very good reason: it?s hard to beat reality.
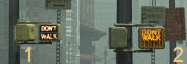
Don't walk sign Comparison of the two "Don't walk" lights, with the final one on the right. [close-up here]
A good deal of time was also spent scanning or retrieving photos of real NY street signs, and then correcting them for parallax, colour saturation and contrast. In a few cases, I had to recreate them from scratch when the original image was too bad or too distorted. Here are the lamp posts and traffic lights. The signs colours are very saturated, otherwise the fog would have killed them.
The source and images maps for the lamps are provided here.
Modeling buildings sometimes starts as good fun, but always turns into the most boring POV-related activity. This was no exception. For a while, I kept retarding the moment when I would have to actually model them by using dummies or even buildings from previous images but unsuitable for this one. The dummies were first just a long box, then a series of randomly sized and coloured boxes. They did fine, but when the picture started to be really complex, it became hard to test it without the realistic buildings.
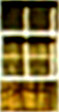
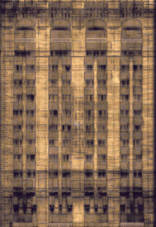
The first step was to find good textures. I knew that I wasn?t going to do it procedurally. A real wall or window structure is very complex, particularly at this scale, and using procedural textures to obtain photorealistic windows would have been a real waste of time and computer memory (I needed hundreds of them). So I took one of my favourite New York books and scanned a dozen of building facades. Every photo was corrected for the parallax, made tileable, and the colors were brightened, contrasted and saturated. Then I devised a system that let me apply a wall/window texture on a box so that the image_map is always scaled with a correct y/x ratio and by an amount related to the theoretical building size, so that all the buildings created that way can be comparable. This system was particulary used to create dummy buildings: a loop would generate 20 or so dummies, each with its randomly chosen size and image maps.
Below is an early render using the dummies (the building on the right was a dummy taken from a previous image). Of course, every dummy was to be replaced by a real model.
Click on the image to see a larger version.
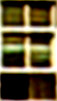
I started by the second building on the left. The main idea was to apply an image map to its height-field counterpart: the image is converted to black and white, and processed until the all the window are black and the window frames and wall parts are white (or light grey). When the original image map is applied, it makes very realistic windows (at least when seen from afar). The first tests were good but I soon came upon something very disturbing: in Megapov 0.4, a bug sends the raytracer into infinite loops when hitting some height fields (this has been fixed in later versions). This was a real problem, because I couldn?t even foresee when this was going to happen. A single image could take several days to render since I had to stop and restart it several times. So the height fields had to go, and I had to replace them by CSG. And then there was another problem: because the image map wasn?t straight: the windows? borders were fuzzy and did not form square angles. I then cut up the original image into 34 little pieces: each piece was applied to its own CSG window, in a random fashion. The result was actually better than the height fields, because I had a total control over the building structure.
Below are 6 examples of these images. All of them was heavily processed, with hightlight/midtone/shadow correction, color saturation and blurring.
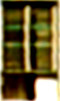


The first building on the left was the closest to the camera, and thus it had to be very detailed. There?s little to say here: it was pure CSG and it took a whole week to build, floor by floor. I used a real picture as a reference. If you go to (or live in) New York, you?ll see a building like this in front of the Flatiron.
When the CSG was finished, I rendered it with an orthographic camera, and I used the resulting image as a basis for the image map. The dirty streaks were obtained using a "wind" filter that makes the dark parts (the windows) "bleed" in a chosen direction. After much blurring and other complicated processing (no photos involved!), I had an image map that could be precisely superposed to the building. Below is a small version of the image map.
The last trick involved the windows? reflections. Since all the windows were identical, it was difficult to have them behave independently. I could have made a macro, but instead I used the "cells" pattern which, applied on a plane directly positioned behind the building, gave the proper effect.
The source and image map for this building are available here.
After spending quite a long time on the lamp posts and on the first two buildings, I didn?t want to model anything else for a while. I knew that the 3dcafe had several buildings available, including a model of the Chrysler building that I had used in 1996 in the picture on the right (not featured in the Book of Beginnings).
At that time, I had been somehow frustrated that I could not put a good texture on it. But now I had Steve Cox? UV mapper ! So I downloaded the building again, converted it to the obj format, created the map with the mapper and went to work on the texture. For this, photographs of the real building were mixed with some of the material that I had previously scanned. This took a whole day to do. Since the map and mesh are very big, I won?t release them but here is how the map looks:
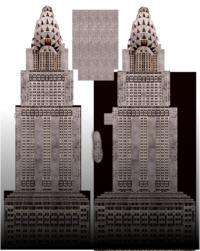
You?ll notice how the building bottom was darkened to make it foggy (or smoggy). The building was converted to 3DS (with Poser) and then to the mesh2 format (with 3DS2pov). It?s used twice in the image (the second time only as a "filling" material).
Another building followed exactly the same process (it?s the smaller one at the foot of the Chrysler, on the right).
The other buildings were done more quickly, as unions of boxes with image maps mixed with procedural textures applied on them. I planned to add details but ran out of time.
The building on the right was taken from one of my previous images. It?s a heavy (1200 lines !) CSG construct that took me a week to build a few months ago. I had to modify it a little so that it could fit in the image. You can see this building in the picture Waiting for Noah (it's the one on the right).
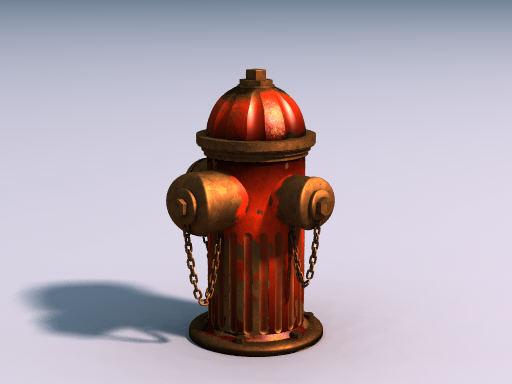
It happened that Christophe Bouffartigue had created a very complex model of a fire hydrant, and gave me the permission to use it in my picture (and to release the source file). Though the model was already very good (you can see it in his own IRTC entry), I wanted to improve the textures. So I spent a day or so on it, first replacing the spheres and cylinders by isosurfaces (so that I could add 3d noise) and then creating a few textures. Actually, it was overkill, because the model could have been used directly, but I had some fun doing so. This model also uses the "link" macro by Chris Colefax. The image on the right shows how it looks with a good lighting. Click here to see a close-up of the model in final image.
The source for the fire hydrant is available here.
The news vending machines are simple CSG, based on photos I had taken in Washington DC in 1992. There is provision in the code for the image maps used to represent the newspaper and the ads.
The source for the vending machines is available here.
There?s a trash can... It is quite hidden now behind the news machines, but it used to be in front of the image. It was made with sPatch and uv-mapped with a TGA bitmap with an alpha channel.
Since most of the image?s atmosphere would be based on the rainy effect, it was of the utmost importance to have a sidewalk and street texture that would reflect the light in a realistic way. I needed patches of darkness with a variable reflection. I thought that to do it procedurally was a nonsense, so I turned to my favourite painting programme instead.
First, I drew a pattern of rectangles of varying grey intensities. This image image was used as a basis for two images : (1) a contour filter provided the height field itself (the cracks following the rectangles outline) ; (2) the blurred and slightly distorted image was used as an image pattern for the sidewalk texture. These images are shown on the right at 20% of their original size :
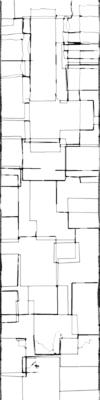
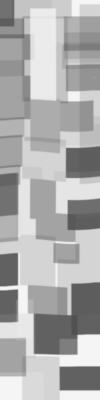
The texture is a texture map mixing, through the image_pattern pattern (a feature available in Megapov and possible in POV 3.5), two textures with different finishes (variable reflection and normal). The "wet" effect was obtained by averaging several normal statements (a bump_map) of different sizes. The several layers of normals are used to simulate reflection blurring. I had tried reflection blurring first but it was too slow for the purpose so I used the classic technique instead.
Here is the code :
#declare c10=color rgb<0.95,0.86,0.5>;

#declare bsize=0.3;

#declare N1=normal{bump_map{png "bitmaps\normalsw"} bump_size bsize turbulence 0.3 scale 10000}

#declare N2=normal{bozo bsize turbulence 1 scale 0.001}

#declare N3=normal{bozo bsize turbulence 1 scale 0.01}

#declare N4=normal{bozo bsize turbulence 1 scale 0.1}

#declare N5=normal{bozo bsize turbulence 1 scale 1}

#declare txtSW1=texture{

pigment{c10*0.1}

normal{average normal_map {[2.0 N1][1 N2][1 N3][1 N4][1 N5]}}

finish{ambient 0 diffuse 0.02 specular 0.002 roughness 0.1

metallic 2 reflect_metallic reflection_type 1 reflection_min 0.0

reflection_max 1 reflection_falloff 6 conserve_energy

}

}

#declare txtSW2=texture{

pigment{c10*0.1}

normal{average normal_map {[1 N2][1 N3][0.4 N4][0.2 N5]} scale 3}

finish{ambient 0 diffuse 0.02 specular 0.002 roughness 0.1

reflection 0.1 reflect_metallic

}

}

#declare txtStr1=texture{

pigment{c10*0.01}

normal{average normal_map {[2.0 N1][1 N2][1 N3][1 N4][2 N5]}}

finish{ambient 0 diffuse 0 specular 0.002 roughness 0.1

reflect_metallic reflection_type 1 reflection_min 0.0

reflection_max 0.7 reflection_falloff 6 conserve_energy

}

}

#declare txtStr2=texture{

pigment{c10*0.01}

normal{average normal_map {[1 N2][1 N3][0.4 N4][0.2 N5]} scale 3}

finish{ambient 0 diffuse 0 specular 0.002 roughness 0.1

reflection 0.1 reflect_metallic

}

}

#declare matSW=material{

texture {

image_pattern { png "bitmaps\swmap" }

turbulence 0.01

texture_map {[0 txtSW1 scale <1/xSW,1/zSW,1>][1 txtSW2 scale <1/xSW,1/zSW,1>]}

scale  rotate x*90

}

interior{ior 1.33}

}
This material was applied to the side walk height-field, and then this element was replicated several times to form the whole sidewalk.
Later on, I drew some random trash elements with sPatch, exported them as DXF, converted them to meshes with Crossroads and arranged the trash randomly with a while loop.
The street is an isosurface plane with noise3d. Its texture is similar to the sidewalk's. The crossing marks are made with height fields and isosurfaces.
The ghost obviously had to be made with Poser. The standard business man was used, and its trenchcoat was taken from the Poser 4 wardrobe. The umbrella was found at Renderosity. Posing it wasn?t difficult but exporting it to Pov was less straightforward that it should have been. Because of the various bugs in Poser's 3DS export, I had to export all the elements independently to the obj format, convert them to 3DS and then to POV. For those unfamiliar with Poser, here is our ghost in flesh and bones:

The ghost texture was mostly black with some reflection. It wasn?t so important, since the ghost would be motion-blurred. The blurring involved both translation and rotation (rotate -y*clock*2 translate <-0.1,0.1,4>*clock) and only 10 samples.
Click here to see a close-up of the ghost.
The cars were a late addition to the image. The deadline was approaching and I felt that the image was somehow too symbolic for my own taste. Also, I had done quite a few empty cities before and this was turning into a personal gimmick. Finally, I felt that the vast expanse of emptiness on the left enhanced the loneliness of the ghost. I wanted it to be lonely, but in a low-key sort of way. And the image was too dark and verging on dull. Here is a snapshot of the image a few days before the deadline: there are no cars, no bird, and a dummy building on the right. The Chrysler building doesn't have its terminal spire yet, that I would later make with CSG.
I then thought that putting cars would add some weight to the scene, add colours and give it more balance. All the cars were found in various 3D model sites. Mostly were in 3DS format, and they were easily converted to the mesh2 format by 3DS2POV. Fortunately, they were all made of different parts textured independently. Unfortunately, it took me some time to figure out what were these parts and how to texture them, not to mention the vastly different units used by the model makers. Some cars were tiny while other were 1000 units large ! Other models were positioned strangely, with the model apparently containing some environment info (lights, ground, sky). Each of the 10 cars had to be processed separately, until I was able to texture and place it accurately. Below is an example of a car definition : the texture names not beginning by "txt" (like MBRASS1) are the ones found in the original 3DS file. The cars were put in an array.
#declare txtPaint=texture{pigment{Black} normal{dents -1 scale
0.01} finish{ambient 0 diffuse 1 specular 1 roughness 0.001 reflection 0.05}}

#declare txtRed=texture{pigment{rgb<1,0.01,0.01>*2} finish{ambient 1 diffuse 0}}

#declare default_texture = texture{txtPaint}

#declare MBLACK_MATTE = texture{txtBlack}

#declare MMaterial__3_azul = texture{txtPaint}

#declare MBLK_PLASTISTEEL = texture{txtBlack}

#declare MMaterial__10 = texture{txtBlack}

#declare MMaterial__2_crom = texture{txtMetal}


#declare MMaterial__8_cris = texture{txtLight}

#declare MMaterial__6 = texture{txtRed}

#declare MMaterial__11 = texture{txtRed}

#declare MBRASS1 = texture{txtMetal}

#declare MBLACK_GLASS = texture{txtGlass}

#declare MBLACK_GLASS1 = texture{txtGlass}

#declare MBLACK_MOLDURAS = texture{txtBlack}

#declare MBEIGE_PLSTC = texture{txtWhite}

#declare MBEIGE_MATTEOBSCU = texture{txtBlack}


#declare MWHITE_MATTE = texture{txtWhite}


#include "cars\limomepo_o.inc"

#declare Cars[7]=union{

object{ pneu1 } object{ carroceria } object{ partegris } object{ ventanas }

object{ parteinfne } object{ moldurasgr } object{ parrillapl } object{ faros }

object{ calaveras } object{ cuartosdel } object{ calaverast } object{ rinesdelan }

object{ rinestrase } object{ pneu02 } object{ asientotra } object{ sombrerera }

object{ Division } object{ cristdivis } object{ sunroofcrs } object{ marcossu01 } object{
suelo }


object{ asientodel } object{ volante } object{ tableroins } object{ antena01 }

translate <0.693465-(0.315712+0.693465)/2,0.165808,2.106578-(0.894266+2.106578)/2>
scale 1.7/(0.165808+0.58554)

}
After that, I had to add better taillights, since a simple ambient 1 texture wasn?t very realistic. This was done with emitting media put in box and spheres. Each media was positioned on the corresponding mesh, by trial and error. Here is an example of media code for the Thunderbird on the left :
#declare TLSmall=sphere{0,1

texture{pigment{Clear} finish{ambient 0 diffuse 0}}

interior{

media{emission Red*3 density{spherical color_map{[0 Black] [1 White*2]}}}

media{emission Yellow*4 density{spherical color_map{[0 Black] [1 White*4]}} scale 0.5}

}

hollow scale 1 translate y*0.5

}


#declare TLLargei=sphere{0,1


texture{pigment{Clear} finish{ambient 0 diffuse 0}}

interior{

media{emission Red*3 density{spherical color_map{[0 Black] [1 White*2]}}}

media{emission rgb<1,0.8,0.1>*4 density{spherical color_map{[0 Black] [1 White*3]}}
scale 0.5}

}

hollow translate <1,0,-1>

}


#declare TLargeCombo=union{

object{TLLargei scale 1}object{TLLargei scale 1 translate x}object{TLLargei scale
<1,0.9,1> translate x*2}

object{TLLargei scale <1,0.8,1> translate x*3}object{TLLargei scale <1,0.9,1>
translate x*4}

object{TLLargei scale <1,0.7,1> translate x*5}object{TLLargei scale <1,0.5,1>

translate x*6}

rotate z*-1 scale <1/6,1,1>

}


#declare TLarge=union{

object{TLargeCombo}

sphere{0,1

texture{pigment{Clear} finish{ambient 0 diffuse 0}}

interior{ media{emission Red*3 density{spherical color_map{[0 Black] [1 White*2]}}}}


hollow scale <0.85,1.1,1.5> translate <1,0,-1>

}

}

object{TLSmall scale <0.25,0.09,0.1> translate <-0.66,0.56,-2.99>} // tlsmall


object{TLSmall scale <0.25,0.09,0.1> translate <-0.66,0.56,-2.99> scale
<-1,1,1>} // tlsmall

object{TLarge translate -0.5*x scale <-0.5,0.12,0.1> translate
<-0.5,0.82,-2.9> } //tlbig


object{TLarge translate -0.5*x scale <-0.5,0.12,0.1> translate
<-0.5,0.82,-2.9> scale <-1,1,1>} //tlbig
There's a 64 Thunderbird, a Toyota, a Porsche, 2 Camaros, 2 Mercedes (including a limo), a Jaguar, a Montecarlo (model by FastTraxxx) and some sort of low-detail Jeep. These 10 cars were replicated 12 times at not memory cost (thanks to the mesh format) and arranged in 3 lines. One last addition was a licence plate for the Thunderbird. I ran out of time to make exhaust fumes.
Here is a close-up of the T-Bird. The close-up also reveals the simplistic halo of the Toyota's taillights...

Note: due to poor management from my part, I didn't keep track of the various authors of the cars, either because their names weren't included with the model, or because the reference was lost during the conversion process. If you recognize your work, please send me a note so that I can credit you properly.
After almost two months of modeling and tuning, I still felt that the final image was not complete. It lacked a focus. Then I realised that the image was actually made of layers: there was the "building" layer, the "cars" layer, the "ghost" layer. Each layer was on a smaller scale than the previous one, though not less important. This was very symbolic of the city as a fractal object, with each component having its own complexity whatever its size. All it needed was an ultimate layer of the smallest scale. Hence the bird, which I could make very small and though very visible. Since I didn?t have the time to model a bird, I first downloaded a sPatch sparrow made by Jerôme Livenais (http://www.chez.com/jrlivenais/vdesprit/gift/gift_eng.htm). I modified it, failed to uv-map it but, after a few test renders, decided that it was a bad choice. Though the model is good (see the image in Jerome?s page), it somehow looked like a bath toy when I put it on the lampost. It ruined the picture ! So I turned to the Web to do some bird-hunting. Finally, I came upon a bird image that, after much processing (it uses an alpha channel), I put on a box. You can see the jpeg version below.
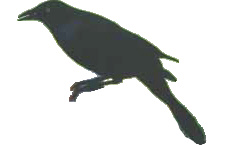
Click here to see a close-up of the bird in the final image.
The picture was over. I knew about its many shortcomings : I could have added more trash (a coca-cola can, cigarette butts, empty bottles), more street signs, exhaust fumes for the cars, better textures for the buildings, better textures for the cars, better tailights, better crossing marks, detailed wiring for the street lights, more street furniture. But a deadline is a deadline and I was quite exhausted anyway.
The final render took about 21 hours on a Pentium II 350 Mhz. Most of it was spent in the last lines, where there are many reflections.